Meatloaf For a Crowd

My sister and her two adult daughters joined us for lunch so I made a larger meatloaf than usual using 3 lbs of ground beef. There aren’t a lot of embellishments here but it is every bit a comfort food and a satisfying centerpiece for a meal.

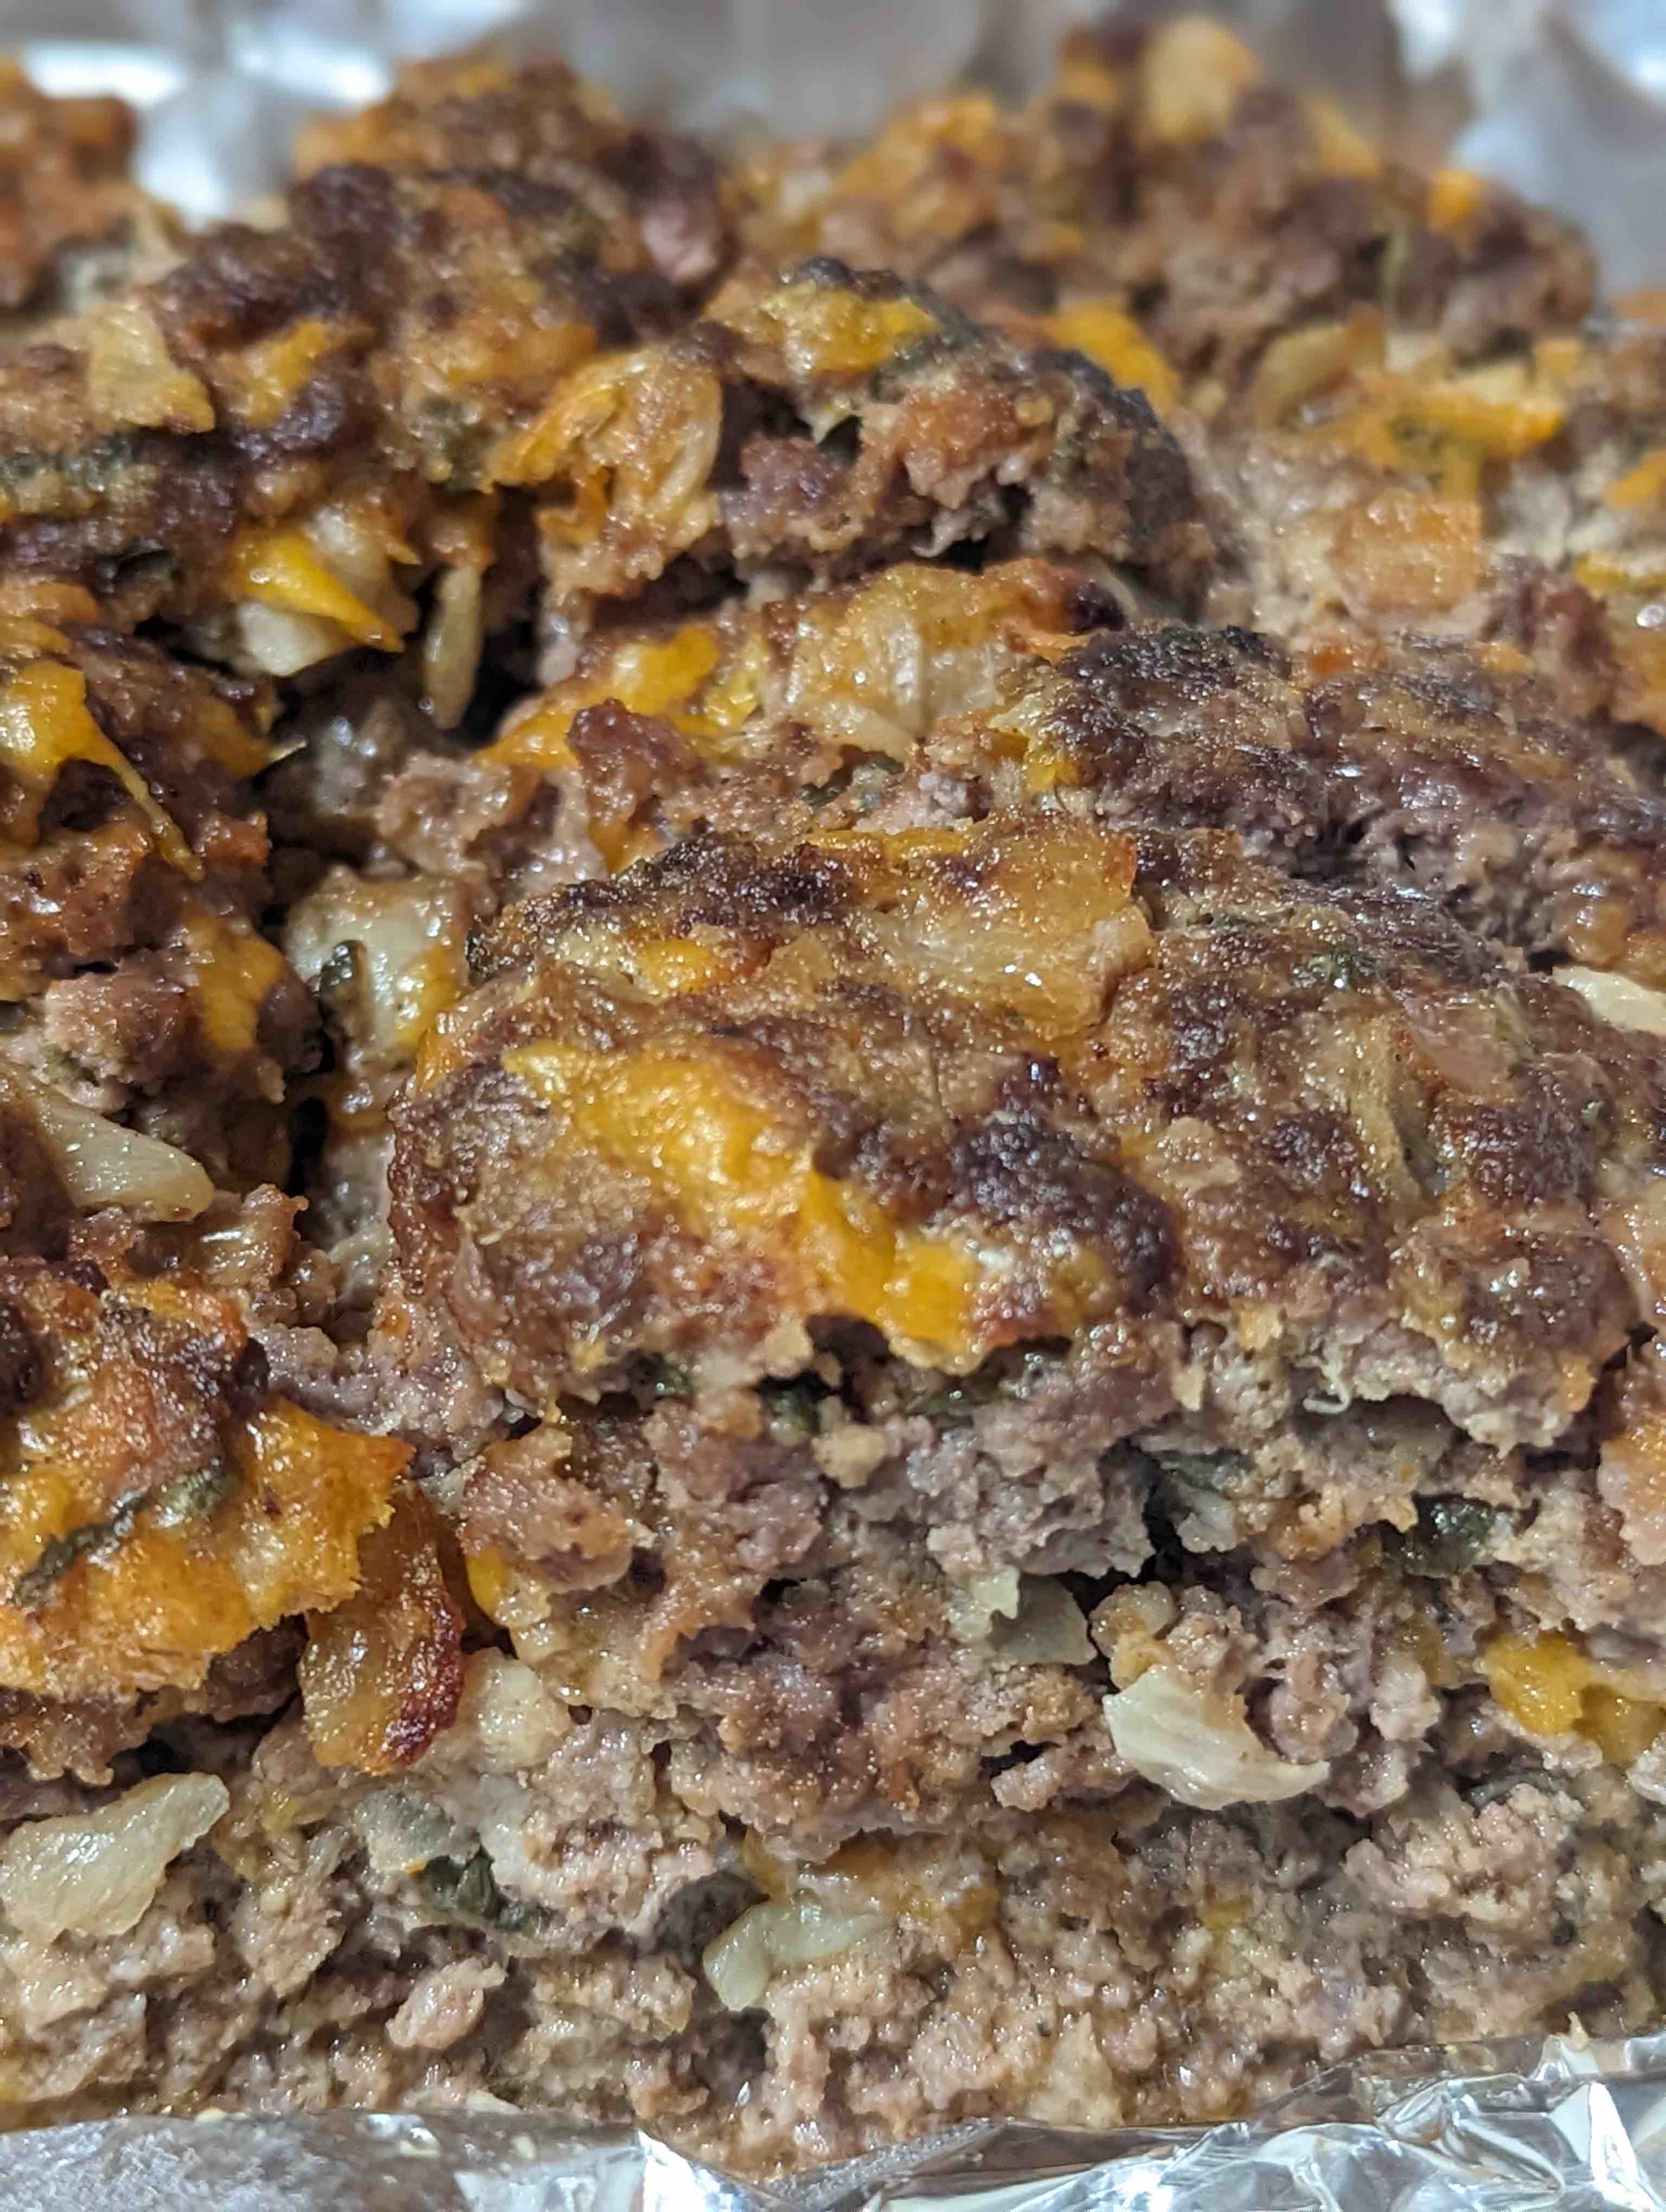
Beefy and moist, this was a hit with everyone. And, lucky me, there is enough left over for a couple of sandwiches, too.

Meatloaf For a Crowd

3 lbs ground beef (80/20)
1 large onion, diced
1 tablespoon butter
1 cup milk
1 cup bread crumbs
3 eggs, lightly beaten
1 cup cheddar cheese, grated
¼ cup ketchup
2 tablespoons Worcestershire sauce
2 tablespoons dried parsley
1 teaspoon salt
½ teaspoon pepper

Preheat the oven to 350°F. Line a rimmed baking pan with aluminum foil and turn up the corners to contain the juices.

In a skillet, cook onions in butter over medium low heat until golden, about 10 minutes. Place in a large mixing bowl to cool completely.

In a small bowl, stir milk into breadcrumbs and let stand for 10 minutes.

Combine with the cooled onions the beaten eggs, moistened bread crumbs, ground beef, grated cheese, ketchup, Worcestershire, parsley and pepper. Mix until just combined before adding salt and then mixing it together. Form into a loaf shape on the prepared pan.

Bake for 50 minutes to an hour or until the interior reaches 160 degrees F. Let rest 10 minutes before serving.

Greek Grilled Quail

One of my parent’s neighbors had some extra quail so he gave us four. I like the flavors of the Mediterranean with grilled poultry – so I did a marinade with garlic, oregano and lemon. I set two zone on the grill for direct and indirect cooking and in short order, we had a delicious meal.

Be sure not to marinate for too long as the acid will toughen the bird. Also, don’t cook it too long over direct heat or they will dry out. Finally, eat quail carefully as you don’t want to crack a tooth or swallow some of the bird shot!

I served rosemary sweet potatoes with them – recipe here. I did have to prebake the sweet potatoes for 30 minutes in a 350 degree F oven as the quail cooks so quick. After the prebake, I peeled them and sliced them and tossed them in rosemary butter brown sugar and then finished them on the grill.

Greek Quail

4 quails
½ cup extra virgin olive oil
¼ cup lemon juice
2 cloves garlic, minced
1 tablespoon oregano
1/2 teaspoon salt
1/4 teaspoon black pepper

Place the quail into gallon size freezer storage bag or a large food storage container. Combine the remaining ingredients, mixing well. Pour the marinade into the bag with the quail, making sure the birds are completely coated.

Marinate for at least 2, but no more than 4 hours. Prepare your grill for two zones with the charcoal on one side.. Cook the quail over direct heat five minutes on each side before moving the quail to a cool part of the grill to finish, about 5 minutes more. Let rest briefly before serving.

Grilled Pork Steaks with Honey Mustard Root Beer Glaze

My brother-in-law had left some pork blade steaks the last time they were here and I’m only just finding them in the back of the freezer. Oops! I decided to combine my honey mustard marinade with my root beer mustard and the result was delicious.

These were fairly thin, so I grilled directly over the coals. They came out juicy with a sweet but tangy glaze. Yum!

Honey Mustard Glaze

4 pork blade steaks or pork chops
1/2 cup honey
1/2 cup spicy brown mustard
1 cup root beer (I prefer Abita Root Beer as they sweeten with cane sugar not high fructose corn syrup)
2 tablespoons Worcestershire Sauce
1/2 teaspoon kosher salt
1/2 teaspoon black pepper

Mix all the marinade ingredients together in a bowl and whisk to combine. Set aside ⅓ cup of the mixture to glaze the pork once on the grill. Pour the rest in a zip top bag and put in the pork steaks or chops. Place in the refrigerator for at least 2 hours.

Grill on a 350 degree direct fire grill for 7-10 minutes on each side or internal temperature is 145 degrees F. Baste with reserved sauce when you flip over the steaks.

Easy Stroganoff

This was a cheap and uncomplicated comfort food from when I was a kid and I still have it as one of my go-to’s when I need a fast and easy meal as it only takes 30 minutes to make. Is it particularly authentic? No but if you want one closer to the old country, I blogged about it here – Leftover Brisket Beef Stroganoff.

I usually use ground chuck as I normally have some in my freezer but any ground meat will do. It is a good idea to pull the sour cream out ahead of time to come to room temperature as it could break or curdle if it is added to the hot dish while still cold.

Creamy without cream and super comforting.

Easy Stroganoff

1 lb ground meat
1 clove garlic, minced
½ lb mushrooms, sliced (fresh or canned)
2 tablespoons flour
½ teaspoon salt
¼ teaspoon pepper
1 can cream of mushroom soup
1 cup sour cream
dash of paprika (optional)

Brown meat. Drain most of the rendered grease, leaving about a tablespoon. Stir in garlic and mushrooms (if canned drain them). Sprinkle over flour and cook, stirring regularly for five minutes. Add seasonings and soup and cook for 10 minutes more. Remove from heat and slowly stir in sour cream. Sprinkle on the paprika and serve over noodles or rice.

One Pot Jambalaya

I made some Tasso ham the other day and set aside a cup of the cubes for this recipe. I also cheated and used a seasoning blend so I didn’t have to chop the onion, celery and bell pepper. I just used two generous cups of the frozen veggies to speed things up. And if you already have a favorite Cajun/Creole Seasoning, use a tablespoon of it to season the chicken. Here is my recipe for a batch to keep on hand.

Everything, including the rice is cooked in the jambalaya making this the perfect one pot meal. Because the Cajuns who developed this meal were a thrifty bunch, this meal stretches with your budget – have shrimp? Toss a handful or two in at the end when returning the chicken to the pot. Only have squirrel or rabbit? Use it in place of the chicken. Vegetarian? Leave out the meats altogether, swap vegetable stock for chicken stock and add red beans to cook with the rice. My version has chicken, ham and sausage so 2 chicken breasts, 1 cup of diced ham and 1 link of sausage add plenty of protein to serve four people while not breaking the bank.

This is a pretty quick recipe and in about an hour you’ll be eating a deliciously, hearty dish that has so many layers of flavors. Fix your plate and we’ll have big fun on the bayou!

One Pot Jambalaya

1 tablespoon paprika
1 teaspoon garlic powder
1 teaspoon onion powder
1 teaspoon dried oregano
1 teaspoon dried thyme
1 teaspoon dried basil
1 teaspoon salt
½ teaspoon freshly ground black pepper
½ teaspoon cayenne pepper
2 boneless, skinless chicken breasts, cut into 1” pieces
4 tablespoons olive oil, divided use
1 medium onion, diced
1 medium green bell pepper, seeded and diced
2 ribs celery, diced
2 cloves garlic, minced
½ cup diced Tasso Ham
3 tablespoons tomato paste
1 teaspoon Worcestershire sauce
1 teaspoon hot sauce
1 cup long-grain rice
3 bay leaves
3 cups chicken stock
1 link andouille sausage, cut into ¼ inch coins

In a small bowl, stir together paprika, garlic powder, onion powder, oregano, thyme, basil, cayenne and salt and pepper. Or, a tablespoon of already prepared Creole/Cajun seasoning. Place the chicken into a medium bowl and toss in the spice mixture until completely coated with the seasoning.

In a large, Dutch oven, heat half of the olive oil over medium-high heat. Add chicken and any extra seasoning from the tossing and sauté until just cooked through, about 5 minutes. Remove with a slotted spoon and set aside. Add the rest of the olive oil to the same pot, along with the onion, bell pepper, and celery; sauté about 3 minutes. Stir in garlic and sauté until fragrant. Add tomato paste, Worcestershire sauce, hot sauce and rice, stirring to coat well. Cook about 2 minutes or until every grain of rice is glistening. Add bay leaves, Tasso ham and chicken stock. Stir well to combine. Bring mixture to a boil then turn the temperature down to just hold a simmer. Cover.

Cook until rice is just tender, about 15-20 minutes. Stir in chicken and andouille sausage. Cook about 10 minutes more with the lid off. Taste for seasoning, adding salt and/or pepper, if needed. Serve.


Tasso Ham Steaks

My sister and her husband came to my place for a weekend of Mardi Gras Carnival parades. When they do this, they usually bring a cooler full of beer and another full of food like two dozen eggs, pork chops, ribeye steaks, plus pounds of cheese, mushrooms, bacon and sausage. Her husband normally makes a big breakfast to fuel everyone for the day and I cook the afternoon/evening meal (as my toleration for crowds is so low I end up leaving early or skipping entirely many parades). This year, we got so busy we didn’t use the ham steaks, so I happily turned them into Tasso ham.

By using ham steaks, I eliminated the need to cure a pork shoulder for three days. Instead, I used the seasoning to coat the already cured ham steaks overnight before smoking low and slow. The result makes a tasty addition to soups, stews and gumbos.

Highly flavorful and I can’t wait to make jambalaya this weekend! To make it easier to add, I store the ham in ziptop bags in one cup amounts in the freezer.

Tasso Ham Steaks

2 – 1/2 inch thick slices of ham steak (about 1.5 lbs each)
2 tablespoons paprika
1 tablespoon kosher salt
1 tablespoon brown sugar
2 teaspoons coarsely ground black pepper
1 teaspoon granulated garlic
½ teaspoon cayenne pepper, or to taste

Mix the seasoning together well. Rub the seasoning into the sliced meat. Place the steaks on a plate and cover with plastic wrap. Refrigerate overnight.

Remove the seasoned ham steaks from the fridge, unwrap them and place on a wire rack. Leave to dry on the counter for at least an hour before preparing the smoker. Set the smoker for a low and slow heat – instead of the usual 200 degree, go lower to 175 degrees. I achieve this in my Weber grill by only filling half the chimney starter and placing the lit charcoal over a horseshoe shaped single layer of unlit briquettes. I used hickory chunks for the smoke.

Place the steaks on the other side of the grill from the coals and smoke for 2 hours or until the internal temperature of the steaks reaches 150 degrees F. Cool completely and cut into cubes. Store in airtight bags in the freezer until ready to use.

I used one cup of Tasso ham in making my one pot jambalaya – see recipe here.

Beefy Corn and Black Bean Chili

We’ve had the first week of sustained 60 degree days, so I decided that I needed to put on a pot of chili to warm the cockles of my heart. Because I’m using canned beans, jarred tomato sauce, frozen corn, etc it doesn’t need to simmer for hours on the stove. In about thirty minutes, you can have a delicious chili with a southwest flavor on your table.

I usually eat this chili with corn tortilla chips instead of the saltines I choose when eating my Chili con Carne. Other toppings you can bring to the table include sour cream, cheddar cheese and slices of jalapeños, if you want some heat.

Such delicious comfort food and so pretty, too!

Beefy Corn and Black Bean Chili

1 tablespoon olive oil
1 medium onion, diced
1 pound ground beef
2 cloves garlic, minced
2 tablespoons chili powder
2 teaspoons ground cumin
1 teaspoon salt
1/2 teaspoon ground black pepper
1 can (15-1/2 ounces) black beans, drained
2 cups frozen corn
1 can (15 ounces) tomato sauce
1 can Ro-tel diced tomatoes with green chilies, undrained
1 cup beer (or water)

In a large Dutch oven or heavy pot, sauté the onion in the olive oil until golden, about 10 minutes. Add in the ground beef and brown. Once the meat is browned, siphon off the fat. Add in the garlic and sauté until fragrant. Add in the rest of the seasonings and stir to bloom their flavor.

Stir in beans, corn, tomato sauce and Ro-tel. Pour in beer (or water) and bring to a boil. Reduce heat; simmer, uncovered, 20-30 minutes, stirring occasionally. Taste for seasonings and serve.

Slow Cooker Tikka Masala Chicken and Rice

I’ve been working on recovery from Hurricane Ida and wanted something easy but delicious for dinner with friends on a weeknight. I have a jar of Maya Kaimal Tikka Masala simmer sauce and I decided to use the method of one of my favorite chicken and rice meals from when I was a kid, updated and with a subcontinental flavor.

A great casserole for my working mom was to put rice and water in a baking dish in the morning. She’d top that with a can of condensed soup (cream of mushroom, cream of celery, cream of broccoli, etc), chicken breasts and maybe some frozen veggies and/or cheese. Covered tightly and refrigerated while we were at school and they went to work. Whoever was home first was responsible for putting it in a 350 degree F oven an hour before dinner time.

Transferring it to a slow cooker meant it needed to get a head start so I used boiling water. To not dilute the sauce, I waited and added the tikka masala sauce after at least 90 minutes of cooking.

The overnight marinade makes the chicken tender and moist. All the flavors of the marinade and tikka masala simmer sauce coming together will make your mouth happy. Using strips of naan to pick up chicken and rice sure beats using a fork and it is a very tasty way to get deliciousness in every bite.

Slow Cooker Tikka Masala Chicken and Rice

2 lbs boneless, skinless chicken – breasts or thighs
½ cup yogurt
3 cloves garlic, minced
½ teaspoon ginger, grated
1 teaspoon kosher salt
2 teaspoons garam masala (optional)
1 cup jasmine rice
1 12.5 ounce jar of Tikka Masala sauce

Cut chicken into inch size pieces.

In a bowl, combine yogurt, garlic, ginger, salt and garam masala, if using. Add the chicken pieces and toss to coat evenly. Place in a zip top bag and refrigerate for up to 24 hours.

Mix together rice with 2 cups of boiling water in the slow cooker. Place the chicken into slow cooker and cover and cook on low for 1 1/2 hours. The rice should have absorbed most of the water by then, if not let cook for 30 minutes more or until rice is soft and chicken is fully cooked. Pour the jar of Tikka Masala sauce over the chicken and stir to mix well. Cook for thirty minutes more for the flavors to come together.

Serve with naan flatbread.

Smoking Beef Ribs on the Grill

I picked up a 3lb vacuum pack of beef riblets because I wanted beef but not a steak. I also didn’t want to have to wait as long as something like a brisket or shoulder would take to smoke.

I started with the rub. I wanted one with no sugar as that doesn’t taste as good on beef as it does on pork. For brisket, I usually use a dalmatian rub of equal parts salt and black pepper but I wanted to put some additional flavor on the ribs. Once I put together granulated garlic and onion and some paprika, it needed a little something morish, so I added dry mustard. Excellent! You could put in some cayenne but the ribs I’m using are thin and I don’t want too much heat.

I cooked them in my Weber kettle grill over indirect with chunks of hickory wood for the smoke. Remember to give yourself plenty of time – smoking time on the grill was three hours but you need to add another hour of rest.

Definitely use a meat thermometer to check the internal temp but you know they’re getting near done when the meat has pulled away from the ends of the bone.

This is what you’re looking for – nice color, they crack a little at the bend and there is at least a finger width of bone showing. If you’ll be patient for just a little longer, you’ll have tender, juicy meat with a lovely flavor from the rub and the smoke.

After the long rest, they were very good and toothsome! Luckily no one else was around to see me eat the whole thing.

Smoking Beef Ribs on the Grill

¼ cup kosher salt 
¼ cup black pepper 
1 tablespoons garlic powder 
1 tablespoons onion powder 
1 tablespoons paprika 
1 tablespoon dry mustard

3 lb rack of beef ribs

Combine the rub ingredients in a bowl and mix well.

Rinse the meat and pat dry. Remove the silver skin from the ribs. Loosen with a dull knife and use a paper towel to pull the membrane off. Coat both sides of the beef with the rub and set in the refrigerator for at least an hour. Store any unused rub in an airtight container.

Remove the meat from fridge and set on counter while the grill is prepped.

Prepare the grill for indirect cooking and to last 3 hours. I do this by putting a ring of unlit coals around my Weber kettle grill, making sure all the briquettes are touching each other. I fill a chimney with charcoal and, once the coals become ashy, I spread them on two sides of the grill, layered on top of some unlit coals. This way, they light the coals beneath them and slowly ignite the rest so the grill should maintain 225-250 degrees F for at least three hours.

Put a drip pan in the center of the grill and add water to the pan. This will keep things moist while the magic happens. Place the rack of ribs bone side down in the center of the grill. Add dampened hickory chunks to the fire to smoke. Let the ribs cook until they reach an internal temperature of 200-205 degrees F. Carry over temperature will bring them to 210, which is ideal for beef ribs. Take ribs off the heat and tent with aluminum foil. Let ribs rest for at least an hour before eating. If it will be longer than an hour before eating, place the ribs in a cooler lined with towels.

You can cheat once the meat reaches an internal temperature of 170 degrees and wrap them in aluminum foil or butcher’s paper and let them finish cooking in an oven at 235 degrees F. While keeping them uncovered on the grill will allow for the best bark, I totally understand using the Texas crutch (and I have done so plenty of times myself).

While I don’t tend to use bbq sauce, the time to do so is when you wrap the ribs or for the final hour of cooking. Give them a generous baste and it will allow for another layer of flavor. Try my coca-cola bbq sauce. I avoid commercial sauces as they have a lot of sugar which can burn and add a bitter taste.

Oven Baked Turkey for the Best Sandwiches

I love turkey sandwiches and these days the price of sliced from the deli is sending me home with a turkey breast to bake my own. I use a simple recipe with just a little seasoning and aromatics in a sealed pot to keep the turkey tender and moist.

Select a bone-in turkey breast that will fit in your Dutch oven with about an inch of space around the bird and sides/lid. Choose a heavy pot – I went with cast iron and a bird of 6 lbs. I did butterfly it by cracking the breastbone in order to get it to lay flat to fit.

I usually divide the sliced turkey into portions that will last me for a week of sandwiches and freeze most of the packages. This cook gave me at least 3 pint freezer bags full of slices, a smaller bag to eat from now and a 2 cup bag of shredded turkey for casseroles.

I make my sandwiches on white bread with mayo, a little salt and a sprinkle of celery seeds. Simply delicious!

Oven Baked Turkey for Sandwiches

1 5-7 lb bone in turkey breast
1 large onion
1 large lemon

Adjust oven rack to lowest position and heat oven to 250 degrees. Rinse turkey and pat dry with paper towels. Season all over with salt and pepper.

Slice the onion and place in the bottom of the pot to give the turkey a platform to rest upon. Halve the lemon and place in the cavity. Put the turkey into the pot. Fit a large piece of aluminum foil over pot, ­pressing to seal, then cover tightly with lid. Transfer pot to oven and cook until turkey registers 160 degrees, about 2 ½ hours for a 6lb turkey.

Remove pot from oven and transfer turkey to carving board. Cover loosely with foil and let rest for at least 30 minutes to cool enough to handle. Pull off and discard the skin and slice the breast meat for sandwiches. Pick any remaining meat from the bones and use for things like turkey tetrazzini.